Search
Call for Live Order Assistance & Technical Support (7:30am-5pm CST)
All Categories
    Menu Close
    RSS

    Blog

    (0) Chemical Handling & Resistance

    Ensure that You and Your Team Remain Safe, Productive, and Efficient by Properly Confirming Chemical Compatibility

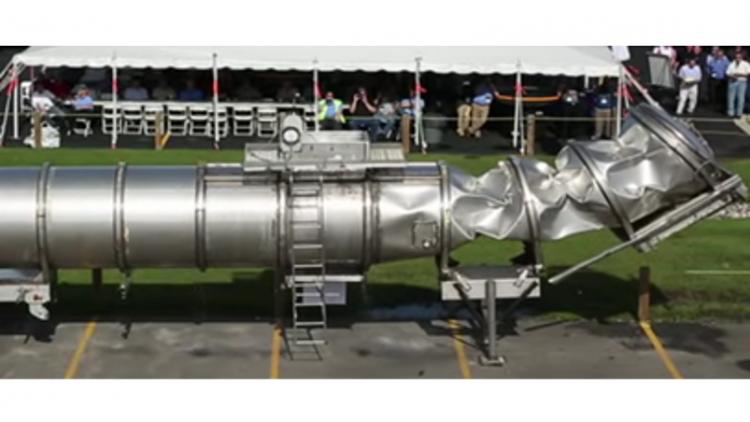
    Have you ever encountered a nightmare situation where a hose miraculously turns to an icky, nasty, pasty goop?  Or how about a pump that starts leaking from virtually every connection point and fitting?  What about a fitting that has a pinhole wear through it after only a few days in service?  These are all scenarios we have witnessed and can help prevent.  Here's how we are going to get you set up with correctly identify chemical compatible products and solutions from the get-go.

    It is extremely important when working with any variety of chemicals or solutions that pumps, hoses, fittings and safety items are correctly matched for chemical compatibility.  Most manufacturers offer chemical resistance charts for their specific product lines and are readily accessible when required.  Check out a thorough chemical compatibility chart from Dura Products in our Resources Library.  And if that chart isn't enough here is another resource for you.  For the safety of you and your employees, it is critical that a proper analysis is made between the solutions you will be handling and the products used to transfer those solutions.


    Grant Me Free Access to Parts Library


    Warranty Issues

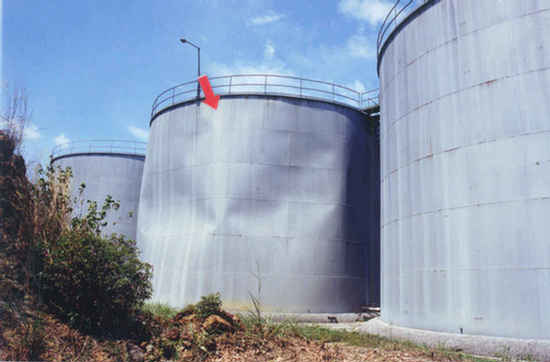
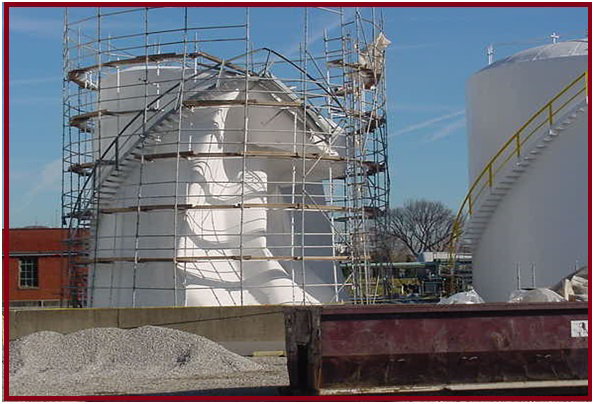
    Also, most manufacturers will not warranty products for compatibility issues if an analysis was not properly completed - prior to product use.  If it is concluded that a specific chemical compatibly issue caused a product to fail or perform there will be, in most scenarios, no warranty granted by the manufacturer.  Failure to perform a proper chemical compatibility check prior to solution handling could result in catastrophic failure of your equipment and extensive unnecessary costs due to downtime and repair/replacement of equipment and components.
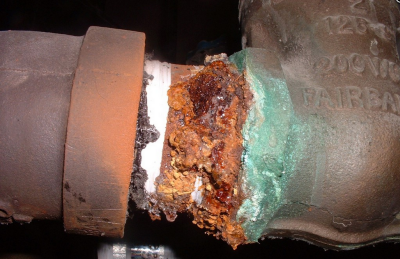

    chemical compatibility issues


    Experiences & Materials

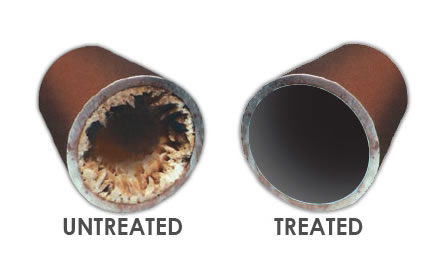
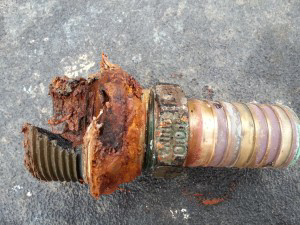
    We have seen EPDM hoses turn to mush when used to transfer oil based products.  Similarly, we have witnessed pump elastomers (seals, O-rings, gaskets) completely deteriorate and create an environment where metal is creating friction against metal inside of pumps.  Without elastomers inside a pump, it cannot function properly.  Furthermore, we have seen PVC fittings completely deteriorate after only one to two weeks in service.

    All of these scenarios could have been avoided had the operators approached us beforehand and identified the solutions to be transferred with their initial choices of products.  Should you ever have questions about chemical compatibility - don't hesitate to contact us - that's what we are here for.

    Common construction materials for pump bodies and housings are Polypropylene, Stainless Steel, Cast Iron, Kynar (PDFV), Brass, Bronze and Aluminum.  Materials generally used in constructing pump seals are Viton, EPDM, Buna, Hytrel, Teflon and Santoprene.  Common construction materials for fittings and accessories, such as strainers and valves, include Polypropylene, Nylon, Brass, Stainless, Cast Iron and Acetal.

    Hoses and tubing are generally constructed of Buna, EPDM, Viton, Teflon, PVC, EVA, Polyethylene or Neoprene.  That being said, your specific application could call for a unique material to be used - given the parameters of the solution you are transferring.

    Next Steps

    Once we have identified the solution we are transferring we can then determine what products are suitable for the transfer of that solution.  Here at Dultmeier Sales we don't guess - we want to do as much as possible to ensure chemical compatibility from the start.  If there are ever questions as to what a solution consists of - you should acquire an SDS or Safety Data Sheet.  This document was formally known as an MSDS (Material Safety Data Sheet).

    By acquiring an SDS we are able to see the highest concentration of a substance in a percentage breakdown.  It is always best practice to find a product that can safely handle all substances that make up a solution.  That being said, that is not possible in every scenario.  In those instances, one should identify the top substance(s) and locate a product that is chemically compatible.  Safety items such as gloves, aprons, boot covers, and arm covers are commonly offered in Neoprene, Nitrile, Latex, PVC.


    Request FREE Catalog


    The first step for proper handling and transfer is to check both the body and the seals of your pumps for compatibility against any number of chemicals.  Remember to consult the SDS of the product(s) you are handling.  The pump body may be rated to handle a specific chemical but the seals may not.  Also, valves and diaphragms need to be reviewed as does any material that will come in contact with a specific chemical or solution.


    fitting failure due to chemical compatibility


    If we don't perform this step our operation will most assuredly come to an inevitable halt - due to failure to properly identify chemical compatibility.  Another note to be aware of is that if you choose to mix multiple chemicals and transfer with one pump - we cannot definitively say what chemical reactions will take place with your elastomers, hoses, fittings, etc.

    When you mix multiple chemicals together you have just altered the chemical makeup of the solution.  We recommend avoiding this scenario unless you are certain the products you are mixing are like products.

    If the pump construction is compatible, next check against fittings and hose that will be used in the application.  We cannot stress this enough - always check compatibility with any and all items that will come in contact with the chemical or solution.  As a general rule Kynar and Teflon are used for very aggressive solutions but are at the high end of the cost spectrum.

    There are some more economical options in EPDM, Viton, and Buna.  EPDM and Viton may work fine for soaps, waxes, and some herbicides and/or pesticides.  Do note that Buna is not suitable for many agricultural chemicals, but is compatible with petroleum-based solutions.  While EPDM is compatible with many chemicals, it is not suitable for oil-based products - stick with Viton or Buna in those scenarios.

    Temperature & Pressure

    Furthermore, it is important to confirm temperature and pressure as these two variables can also affect compatibility.  Temperature and pressure should always be taken into consideration as it can vary with every application or between applications.  For instance, a chemical may respond differently with changes or fluctuations in either temperature and/or pressure.

    The fluctuations may actually cause the chemical to completely alter it's structure and no longer be compatible with elastomers or products that were previously identified as chemically compatible.  Long story short, you may be fine transferring and handling a product at ambient temperatures, but may find an issue at higher temperatures or pressures.

    Remember to check for compatibility with all of the item groups above.   Any chemicals or solutions that you may be handling or transferring should always be confirmed with an SDS - if chemical compatibility is in question. Think chemical compatibility first for safety and protection of yourself and others.  Furthermore, we want to ensure greater longevity and performance of your pumps, valves, fittings, and hoses.  Request a Free Catalog here.

    If you enjoyed this post check out our technical library for more resources.  Can't find what you're looking for?  Give us a buzz or drop by our website.  Be safe out there.

    (0) This is What Happens When a Tank Isn't Vented Properly

    One must always keep in mind that it is extremely crucial to have proper ventilation - IN ANY tank that holds liquid.  A tank vent may seem like a small component of the system, but it is absolutely necessary.  If there is a pump attached to the tank and that pump is drawing suction from said tank, it is imperative to properly vent the tank.

    Without proper ventilation one can turn a rail car - as seen in the video above - into a pop can.  Do note, that tank above is a standard liquid transport rail car and weighs approximately 68,000lbs (34 tons) with a minimum wall thickness of 7/16IN plated steel.  Bottom line - make sure you have a tank vent installed in any tank you use.

    Even in the smallest of tank applications, it is absolutely prudent to install a vent in every tank.  We have seen many applications over the years where a turf applicator, using a small 50-100 gallon tank, did not properly vent their tank and collapsed the sidewalls by using a small transfer pump.  A vacuum can be created rather quickly in many plumbing situations.

    Another example is commonly found in the retail fertilizer industry.  Many companies will pull from 275 gallon cage totes with concentrated chemical and dispense into smaller containers or mix with other products.  If these polyethylene tanks do not have a tank vent and are, therefore, not vented properly, they too will collapse.

    Crushed Fertilizer Transport Trailer


    This does not only happen in transfer tank scenarios.  There are many applications in which actual bulk storage tanks have collapsed due to the creation of a vacuum in the plumbing system.  When a pump is starved of liquid, it will begin to cavitate.  We will have a future post on what pump cavitation is and how to avoid it.  In larger bulk tank storage scenarios we have seen tank vents become clogged up with dirt, debris, bugs, etc.  This happens from simply being exposed to the environment.  The inspection of ALL tank vents should be written into any annual or bi-annual safety inspection protocol.


    Grant Me Free Access to Parts Library


    With ever-increasing OSHA regulations, this task could be difficult to accomplish without repercussions.  OSHA does not want employees on top of storage or transfer tanks for obvious safety reasons.  Should they find a company employee on top of tanks, potential fines could be imposed.  That being said, if no one is inspecting tank vents how do we prevent tank collapses from happening more often?

    Below are a couple of images of bulk tanks that were sucked in or "collapsed" due to pump cavitation.  The cavitation was so great that it essentially created a full vacuum and collapsed the tank walls.  A tank collapses because a complete vacuum has been created in the plumbing system and, due to the tank having the largest surface area, it is generally one of the weaker points in the plumbing system; relatively speaking.

    vacuum is the absence of pressure.  If there is no pressure internally, there is no force to combat atmospheric pressure.  There is and always will be a constant force (atmospheric pressure) acting on the exterior of the tank walls.  Atmospheric pressure is 14.7 pounds per square inch.  When a full vacuum is created there is no internal pressure in the tank to combat atmospheric pressure (external force) and the result is evident in the video above.


    Collapsed Side Tank Walls due to Cavitation


    Collapsed Fertilizer Storage Tank due to Cavitation


    In smaller applications, such as a spot sprayer or small acreage spray unit, a basic vented lid cap can be used to avoid tank collapse.  Do note, that the user will see some slosh or spillage come out of the vent.  This is normal as the vent is doing what it is intended to do - allowing the tank to exhaust internal pressure and "breathe".  Even in small tank applications like this spot sprayer, it's critical to have a vent.  Many solutions will tend to vaporize as they warm up.  This causes an expansion due to added volume that the vapor creates.  Without a vent, an end user will notice a swelling in even the smallest of tanks.

    Many smaller vent caps are simplistic and just have an internal spring.  The spring acts as a relief valve and exhausts the pressure in the tank.  Furthermore, the vent allows air to enter the tank, as well - it's a bidirectional valve.

    Therefore, when pressure builds in the tank - due to product heating up, expanding, or vaporizing - the tank valve allows that pressure to be released or exhausted.  Thus, a vent can work in two different ways.

    First, it helps a tank from collapsing in on itself if a vacuum is created in the plumbing system.  As seen in large tank pictures above, we can do the same thing to smaller tanks if we create a vacuum in the plumbing system.  Secondly, the vent allows a tank to breath outward if the liquid inside the tank begins to vaporize - when a liquid vaporizes and turns into a gas it actually takes up more space.  This can be seen with a small plastic gas tank if left out in the sun.  While a tank can collapse inward it can also rupture outward.

    The bottom line, key takeaway from this discussion topic - always use a tank vent valve to ensure that your tank remains in service and you don't have a major mess on your hands.  If you have further questions don't hesitate to give us a shout.  Your Experts in Delivering Fluid Handling Solutions - We Know Flow!

    (0) Water Hardness and Total Dissolved Solids

    Low water hardness and low TDS (Total Dissolved Solids) are critical for proper cleaning and reduction of water spotting in car and truck wash applications. Water hardness is measured in grains of hardness. Typical drinking water can range from 100-250 grains of hardness. However, water hardness under 5 grains is usually best for the most efficient use of detergents or soaps in vehicle cleaning.

    A water softener is usually required to get hardness down to zero grains which is necessary to, in turn, get TDS down to zero. The size of the softener required is a function of the quality of the incoming water, as well as, the gallons required in a typical day for a specific facility.  Left untreated, high mineral content in a plumbing system can tremendously affect the efficiency of the plumbing system, as well as, reduce the life of pumps, valves, and other equipment.


    Treated vs Untreated Water Pipes


    TDS (Total Dissolved Solids) is the makeup of minerals, salts, metals, etc. that are present in a volume of water. This can include any inorganic element that is present in water other than pure (H20) water molecules. Typically TDS is measured in PPM, (Parts per million). The EPA allows up to 500 PPM for human consumption in water but vehicle washes need to be in the range of 0-50 PPM to rinse and dry without spotting.

    Therefore; typical reverse osmosis, spot free rinse vehicle system will produce zero parts per million (PPM) of TDS when the filter/membranes in the system are new. Thin-film Composite or Cellulose Acetate membranes are designed to reduce zero grain water to zero TDS water. As membranes provide the filtering process over time, they will begin to plug or foul. The amount of time for this to occur depends on water usage and flow.


    New Call-to-action


    Typical testing will show TDS increasing, with spotting occurring about 40PPM. At this point, membranes should be replaced which will bring the TDS back to zero and the process begins again. Membrane material differs and is specifically designed for tap water, brackish water and seawater. Tap water membranes are used with typical city supplied water.

    There are many simple devices available to test for water hardness and TDS to ensure your softeners, spot-free rinse system and filters are operating properly and efficiently.  If you have further questions about reducing the amount of total dissolved solids in your business plumbing system give us a call at 1-888-677-5054 or visit us here.  Take care!

    (0) Horsepower Sizing for Various Pumping Applications

    Have you ever wondered how to quickly and accurately solve the problem of correctly sizing the horsepower for a pumping application?  In this post we offer a short lesson in yet another technical application that our Sales Team deals with on a daily basis.  We practice the principle of horsepower sizing almost every day at Dultmeier Sales.

    In order to correctly size the horsepower for an application one must perform the following equation(s) in order to calculate.  For positive displacement pumps we use the output pressure & flow rate required to determine the required horsepower.  Centrifugal pump horsepower sizing is calculated using different methodology.  We will elaborate on centrifugal pumps later in this post.

    For positive displacement pumps, such as plunger, piston, diaphragm, or roller pumps we want to take the pressure (psi) x flow rate (gpm) divided by the constant for the particular type of pump, (which is based on the general efficiency of the pump type).

    Determine the Type of Pump & Drive Option

    For Piston and Plunger pumps, the constant factor is 1460. Roller pumps we use 1030.  Lastly, Diaphragm pumps we use a factor of 1370.  These constant factors are used for pumping water solutions - if we get heavier or more viscous solutions than water - our factors will need to be altered.

    Centrifugal and Gear pumps can vary greatly and must be engineered to the specific application.  That being said, we can look at some examples further down the line in this post.

    We also need to consider the type of drive option that will be used.  For instance, when using an electric motor versus a gas or diesel engine, there are varying drive constant factors, as well.  More on this below in the post.

    Horsepower Sizing Examples Explained

    Example 1: Plunger pump rated flow is 4 gpm at 2000 psi. “EBH” or Electric Brake Horsepower required would be 4 x 2000 = 8000 divided by 1460 = 5.48.  This equation shows us that we would require an electric motor with at least 5.48 horse power output to allow the pump to operate at peak performance. In this instance you would most likely need to use a 7-1/2 HP electric motor as most motor brands are generally 1HP, 1.5HP, 2HP, 3HP, 5HP, 7.5HP, 10HP, 15HP, 20HP, 25HP, etc.

    It is important to note that electric motors have a rated horsepower and your specific application will have a required horsepower.  Required specifies the horsepower needed to produce the desired output flow and pressure.  While, rated horsepower defines the horsepower at which the motor is rated.  For instance, if the application requires a 13 HP motor, one would need to select a motor that is rated for 15 HP (there is not an electric motor rated for 13 HP or 14 HP).  Best practice is to select a motor that has a rated horsepower which exceeds your required application horsepower.

    Example 2: Diaphragm pump rated flow is 12 gpm at 500 psi. The EBH would be calculated as such: 12 x 500 = 6000 divided by 1370 = 4.38 This would require an electric motor with at least 4.38 horsepower output to allow this pump to operate at peak performance.

    Specialty Applications - Diesel Transfer Horse Power Sizing

    For calculating gas or diesel engine horsepower requirements, a general rule is to take EBH required x 2.0. Example 1 above would require 5.48 EBH x 2. 0 = 10.96 engine horsepower requirement. Therefore you would need a gas or diesel engine that will develop at least 10.96 horsepower to allow the pump to operate at peak performance.

    You can look at some diesel transfer units (centrifugal pump) that we have sized specifically for flow rates at the nozzle.  We have multiple offerings that are designed to produce flow rates through a plumbing system.  When calculating, we figure in the Total Dynamic Head of the plumbing system.  In the case of our Diesel Transfer Skids, that means the pressure loss through the hose reel, 32ft of hose (inside diameter varies based upon specific unit) and a discharge nozzle.  We use a self-priming centrifugal pump in these skid systems.  When dealing with self-primer centrifugal pumps a safe efficiency factor to use is 50% efficiency.

    When using gas or diesel engines to power pumps, depending on specific brands, “engine” horsepower requirements could be reduced slightly in some instances.  For instance, some engines may have a higher compression or provide more torque as a result of enhance production practices.  This is generally a smaller factor but something to consider when powering a pump with an engine.

    Centrifugal Pump Horsepower Sizing

    A major difference in sizing centrifugal pumps lies in the size, or trim, of the impeller.  Based upon the solution, desired flow rates, and TDH in the plumbing system - we will size a pump to have a certain impeller trim and this directly correlates to the required horse power.

    Generally speaking, we use pump curves to assist in sizing a centrifugal pump for a specific application.  A pump will ALWAYS operate on it's curve.  That's why it is vital to accurately determine our desired output flow rate, TDH, and solution being transferred.  All of these factors, and actually many more like temperature and viscosity can, and will, affect the required horse power and impeller size of a centrifugal pump.

    We have multiple tools at our disposal to assist with this process.  One of them comes from a supplier of ours, Wilo.  Dultmeier Sales' expertise paired with the expertise of Wilo helps us to provide a value-added service for our customers in pump/motor sizing for many applications.

    Standard Efficient vs. Premium Efficient Electric Motors

    Another important note to make is the difference between a standard efficient motor and a premium efficient motor.  With the passing of Department of Energy regulations in January 2020 - many pumps (specifically straight centrifugal pumps) are now held to a certain degree of efficiency standards.  The main goal being power consumption.  Premium efficient motors are designed to be just that...much more efficient than a standard efficient motor.

    Many pump manufacturers have since, or are in the process of switching, to premium efficient motors to assist in ensuring their pump products meet the mandated efficiency standards.  Some manufacturers were able to re-engineer their pumps to meet the regulations - while others needed to redesign the pumps and upgrade to premium efficient motors.

    Be aware, in some larger NEMA frame motors, the premium efficient option can boast a larger footprint.  If your motor footprints do not match, this could cause an issue when you go to install the replacement motor.  This is an important thing to consider when replacing standard efficient motors.

    Service Factor in Electric Motors

    Lastly, we want to consider the service factor in an electric motor of choice.  A common service factor that many motor manufacturers use is 1.15.  This means if your horsepower is rated to 20 HP then you actually have some leeway to go slightly beyond the rating - if necessary.  20 HP x 1.15 Service Factor = 23 HP.  If our application had a required horsepower of 22.25 HP we could select this example motor with a service factor of 1.15.

    While it's certainly not advised to select the example 20 HP motor in this instance - it could work.  We would always caution on the side of error and advise the end user to select a rated 25 HP motor.

    We certainly hope that this post provided useful content.  As always, should you have any questions about pump sizing - don't hesitate to call us at 888-677-5054.  Be good out there.