


You are likely familiar with the concept of using a Venturi manifold with a single cone-bottom tank to inject chemicals into your sprayer or tender trailer tank. But one question we get is, "Can one Venturi manifold be used to pull chemicals from multiple cone-bottom tanks?"
The answer is yes. You can use one Venturi manifold (also known as an inductor assembly) and pull chemicals from multiple cone-bottom inductor tanks. This type of chemical mixing setup can be very beneficial. It can not only speed up your mixing process but also provide versatility as well.
If you are going to implement multiple cone bottom inductor tanks with a single venturi, there are some key points to consider to ensure optimal performance. Let’s take a closer look at how to set it up effectively.
Benefits of Using Multiple Inductor Tanks
There are many reasons why using multiple inductor tanks would be a good option:
- Decrease mixing time
- Simplify your chemical mixing process
- Handle products that don’t mix well together
- Handle products that need a lot of time to dissolve
- Pre-stage chemicals separately and add them one at a time into the carrier line
- Easily swap between products or loads without rinsing a single inductor tank multiple times
- Allow multiple operators to stage tanks simultaneously to reduce downtime
How to Set Up a Multi-Tank Chemical Inductor System with One Venturi Manifold
Before jumping into the details, it is helpful to understand the basics of how a chemical induction system with a venturi functions. If you want a detailed explanation, please refer to our guide on chemical inductors, but the basic principle is that adequate flow from a centrifugal transfer pump through the venturi will create suction that pulls in liquid from a cone bottom tank.
DU1A30 Chemical Inductor System:
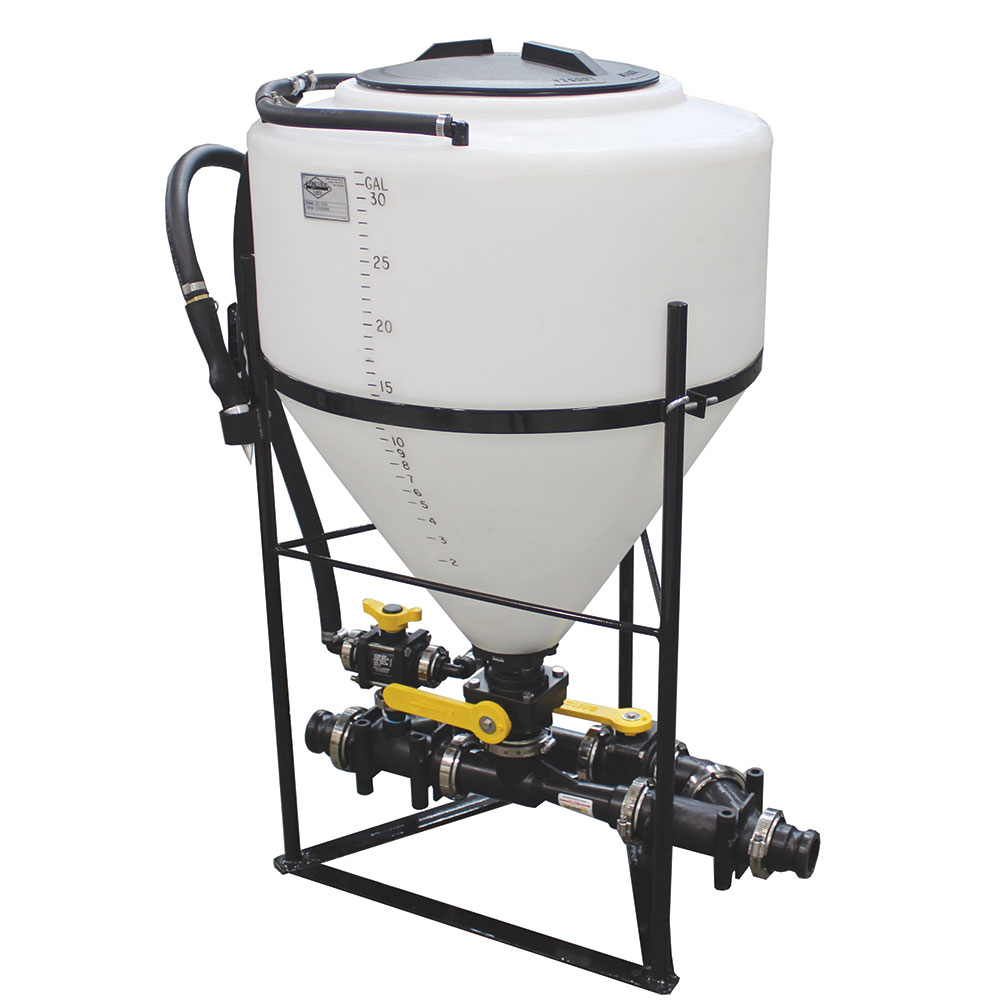
Typically, the venuri is connected directly to the outlet of the tank, as with our inductor systems, but when using multiple tanks, you will construct a simple manifold to unite each tank into one inductor assembly.
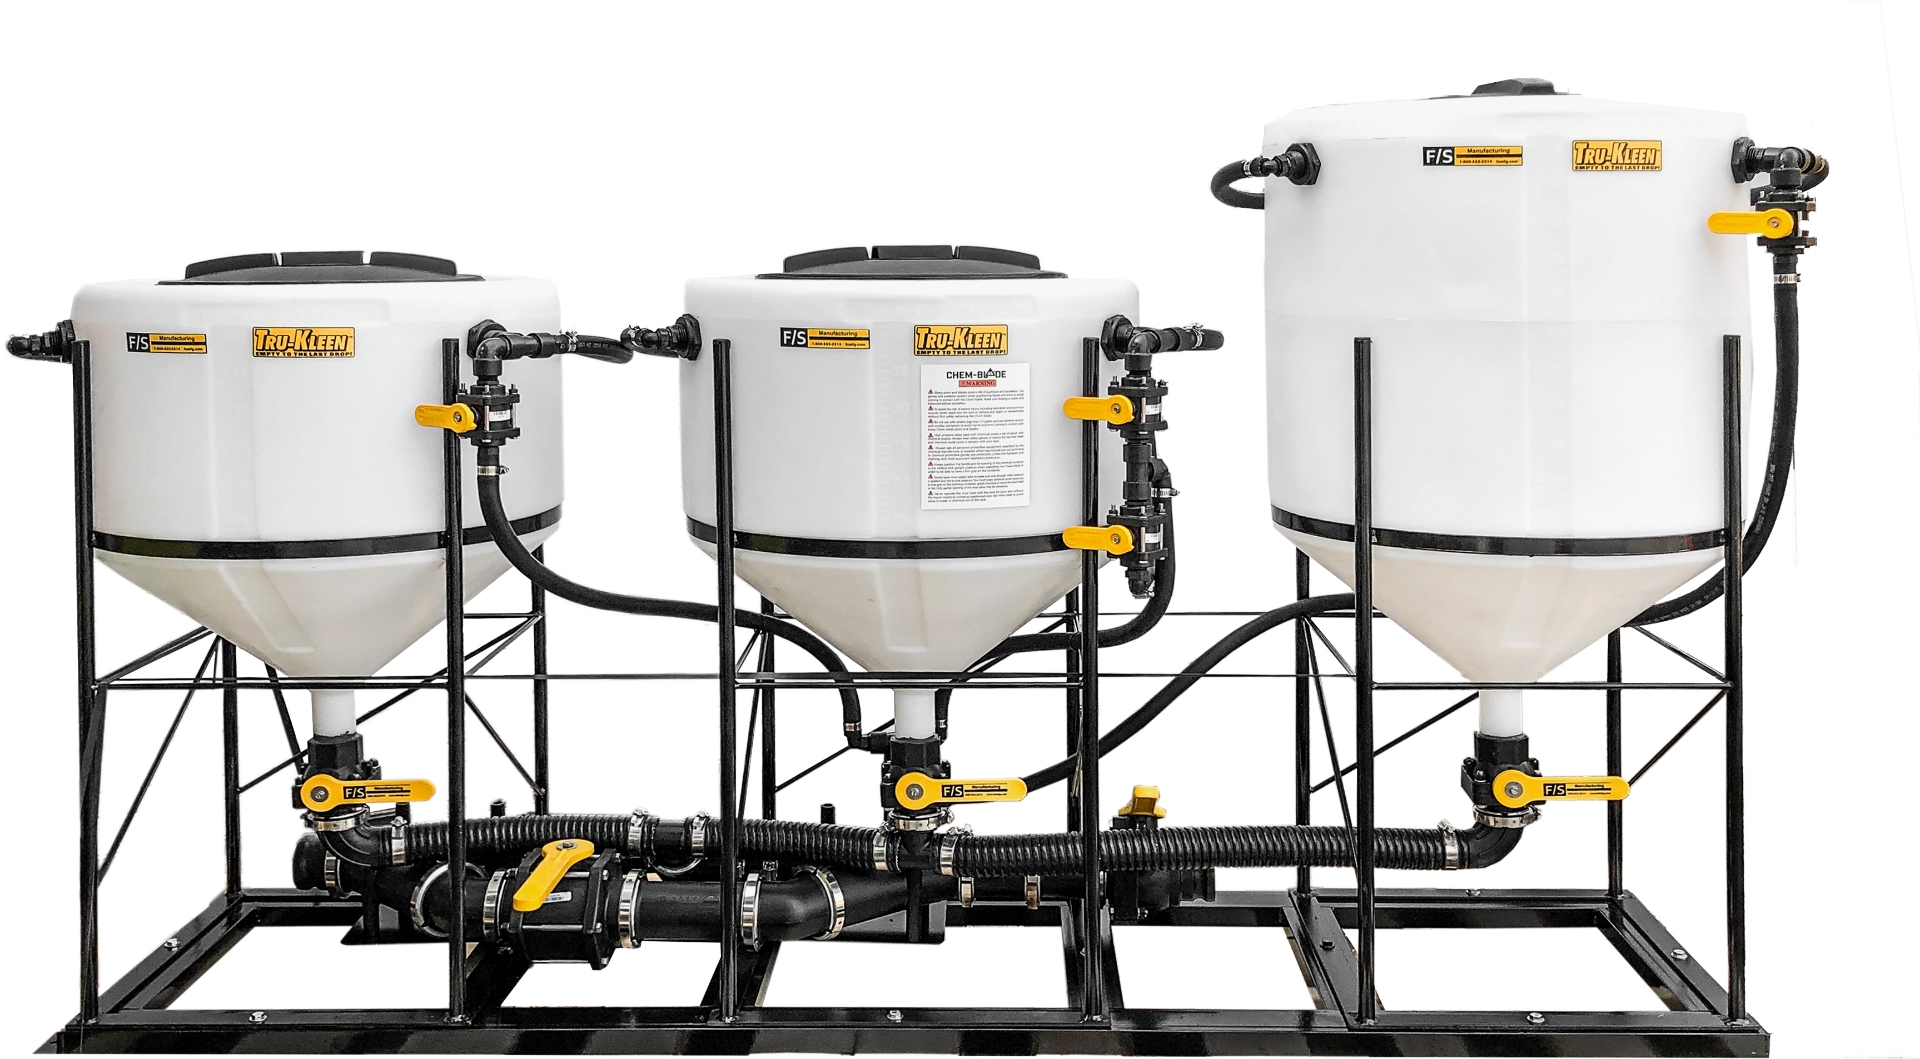
FS Manufacturing builds chemical inductor units with either two or three tanks that share a single inductor assembly. These systems come completely assembled on a skid and have several features for rinsing the tanks and chemical jugs.
FS Tru-Kleen™ Triple Chemical Inductors:
You can check out these options here:
Benefits of FS Tru-Kleen Chemical Inductors:
- Quality components: Kanaflex hose, Banjo Valves, and fittings
- Space-saving design: fits into a tight footprint while maintaining easy access to all valves
- Pre-plumbed and ready for operation: saves you time and headaches
- Complete drainout tanks: effective and complete cleanout minimizes cross-contamination
Plumbing Multiple Inductor Tanks Together Yourself
With several options, one of the FS Tru-Kleen systems can suit just about anyone. If, however, you have a cone bottom tank or tanks already, then you can join them easily with some specific plumbing components although they won’t have the same streamlined skid and all the rinse options pre-plumbed.
Here’s what you’ll need:
- Inductor manifold assembly - Item # TKMIS220A for 2” and TKMIS300A for 3”
- Cone bottom tanks – Many sizes to choose from, typically one to three, ranging from 30 to 60 gallons
- 2-inch valve for each tank - TKMVSMT220FP
- 2-Inch elbow - TK918-2
- 2 inch manifold flange x hose barb “tee” - TKM220200HBT x 2
- 2-inch suction hose - KA390SD-2 (approximately 6-8 ft)
- Manifold Flange Clamps - TKFC220
- Manifold Flange Gaskets - TKM221G
- Rinse hose - GA3204-1425
- Tank rinse valves - TKUV075FP
- Tank bulkhead fitting for rinse - TKTF075
- Other elbows, nipples, fittings, and clamps will be necessary depending on your setup
Assembly
When you have determined how many tanks you want to use and what sizes, you can begin by positioning them in place. Consider the overall space you have and how close you want each tank. From there, you can get measurements and determine where you can place all of your plumbing components so they are accessible and will not interfere with other pieces. Laying everything out before making permanent connections can be helpful.
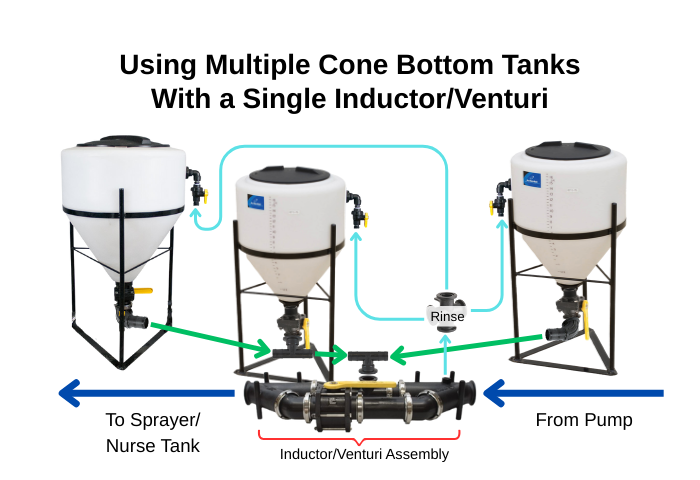
The diagram below can serve as your road map, although you may want different size tanks, spacing, rinse features, etc., the basic layout won’t change. Ultimately, you can set this up in just about any manner you choose as long as the venturi/inductor assembly is still able to draw fluid from each tank at a satisfactory rate.
The diagram shows basic plumbing to supply rinse water to each tank. You can add multiple rinse ports for a thorough clean-out. You can also use jug rinse nozzles or even a Chem-blade system inside each tank.
Diagram of Multiple Inductor Tanks
Important factors to keep in mind during assembly:
- Ensure the inlet port of the inductor assembly is positioned so the pump is pushing liquid through in the correct direction - see specifics in our inductor guide
- Make sure all of the valve handles open and close without interference from any tank stand legs, hoses, etc
- Hoses connecting each tank to the venturi can be curved, but sharp bends or restrictions may affect suction
- Use quality fittings and secure all connections tightly to prevent air leaks, which can significantly hinder performance
- Use individual valves on each tank outlet so you can isolate each chemical source
Optional Inductor System Features:
- Label tanks clearly with product names or batch numbers
- Consider a check valve upstream of the Venturi to prevent any potential backflow into clean water tanks
- If pulling thick or slow-dissolving products, recirculate the tank with an eductor or agitation line before pulling through the Venturi
- Use larger bypass plumbing to fill your sprayer or nurse tank faster when not injecting chemical
Conclusion
Using one Venturi manifold with multiple cone bottom tanks is a smart way to improve efficiency, reduce mixing times, and increase flexibility in your chemical loading process. Whether you're building a custom system with existing tanks or investing in a pre-plumbed unit like the FS Tru-Kleen™ series, the result is a cleaner, faster, and more organized workflow.
Need help designing your setup or picking the right parts? Reach out—we’d be glad to help you find the pieces you need.
Tech Ag & Industrial Sales
Shane Blomendahl is a tech sales veteran at Dultmeier Sales with over 10+ years of experience in liquid handling products covering several industries and applications.